How to build a Todo app with RxJS, Svelte and Firebase
Let's continue playing with Firebase by building a Todo app with Svelte and RxJS.
In my previous article on local Firebase setup I created a simple Todo app as an example. Today, I plan to take it further and create a full blown Todo app.
Also, we will use RxJS, and its Firebase bindings - RxFire, to showcase how you can use RxJS together with Firebase's Firestore and why it's such an awesome combination.
What you will learn:
- How to use RxJS with Firebase Firestore
- How to use RxJS with Svelte
- How to use RxJS with Typescript
- How to keep business logic outside Svelte
- The power of Svelte's computed variables
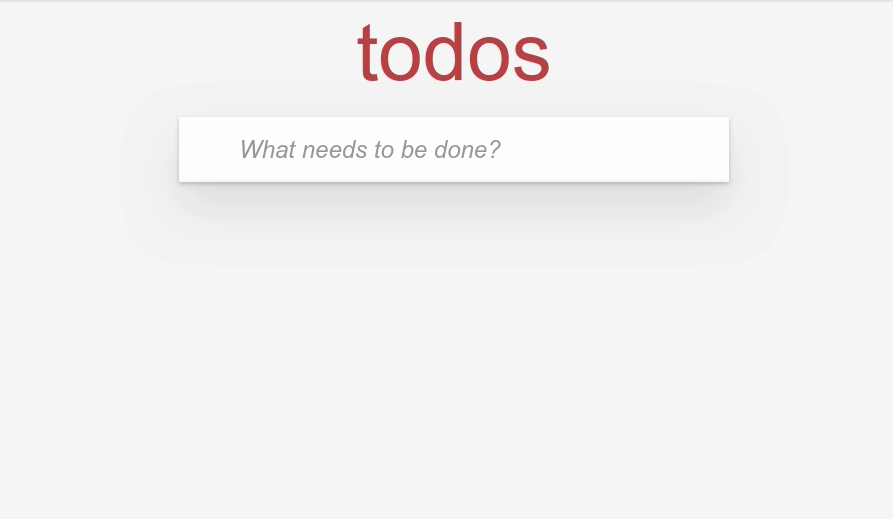
As a base for business logic and UX we will take the classic TodoMVC app as example. To get a feel for what we will build take a look at Firebase + AngularJS example.
Here is the final final result of what we will build.
We won't build it exactly according to the TodoMVC spec, but rather use it as an inspiration. We will however reuse its stylesheets and HTML layout. Why reinvent the wheel, right?
Initial Setup#
To get the local Firebase environment working we will reuse the base project from my last Firebase article - Smooth local Firebase development setup with Firebase emulator and Snowpack.
$ git clone git@github.com:codechips/svelte-local-firebase-emulator-setup.git \
  svelte-firebase-rxjs-todo-app
$ cd svelte-firebase-rxjs-todo-app && npm iNote: make sure you have Java Runtime and firebase-tools installed before continuing. Use my previous article as a reference on how to install them.
Also, we won't be using Firebase functions in our project so we can remove all references to them.
- Delete the
functionsdirectory - Remove the
"start:functions"script frompackage.json - Remove functions emulator from
firebase.json
Done? Good. Let's continue.
First, we need to download two CSS files from TodoMVC repos.
$ curl -o src/base.css https://raw.githubusercontent.com/tastejs/todomvc-common/master/base.css
$ curl -o src/index.css https://raw.githubusercontent.com/tastejs/todomvc-app-css/master/index.css
Next, we need to set the base layout for our app. Edit the src/App.svelte file and replace it with the following code.
<!-- App.svelte -->
<script>
// import TodoMVC stylesheets
import './base.css';
import './index.css';
</script>
<section class="todoapp">
<header class="header">
<h1>todos</h1>
<input class="new-todo" placeholder="What needs to be done?" autofocus />
</header>
<section class="main">
<input id="toggle-all" class="toggle-all" type="checkbox" />
<label for="toggle-all">Mark all as complete</label>
<ul class="todo-list">
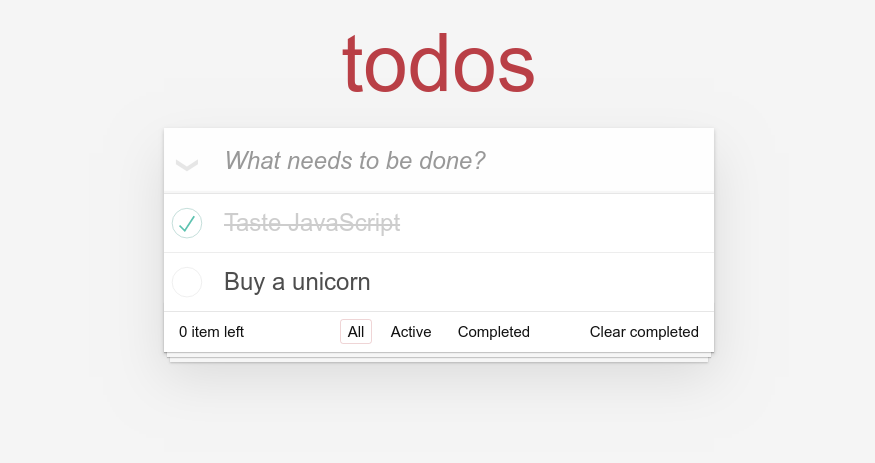
<li class="completed">
<div class="view">
<input class="toggle" type="checkbox" checked />
<label>Taste JavaScript</label>
<button class="destroy" />
</div>
<input class="edit" value="Create a TodoMVC template" />
</li>
<li>
<div class="view">
<input class="toggle" type="checkbox" />
<label>Buy a unicorn</label>
<button class="destroy" />
</div>
<input class="edit" value="Rule the web" />
</li>
</ul>
</section>
<footer class="footer">
<span class="todo-count">
<strong>0</strong>
item left
</span>
<ul class="filters">
<li>
<a class="selected" href="#/">All</a>
</li>
<li>
<a href="#/active">Active</a>
</li>
<li>
<a href="#/completed">Completed</a>
</li>
</ul>
<button class="clear-completed">Clear completed</button>
</footer>
</section>
It's pretty neat that Snowpack allows us to import CSS files in our code.
If you start the app now (npm start) you will see a static version of the app that we will build.
Refactoring to components#
We want to keep things clean so we will extract the header and footer to separate Svelte components.
First, we will extract the header.
<!-- Header.svelte -->

<header class="header">
  <h1>todos</h1>
  <input class="new-todo" placeholder="What needs to be done?" autofocus />
</header>
Now, we will extract the footer.
<!-- Footer.svelte -->

<footer class="footer">
  <span class="todo-count">
    <strong>0</strong>
    item left
  </span>
  <ul class="filters">
    <li>
      <a class="selected" href="#/">All</a>
    </li>
    <li>
      <a href="#/active">Active</a>
    </li>
    <li>
      <a href="#/completed">Completed</a>
    </li>
  </ul>
  <button class="clear-completed">Clear completed</button>
</footer>
Our App.svelte file should look like this now.
<!-- App.svelte -->

<script>
	// import TodoMVC stylesheets
	import './base.css';
	import './index.css';

	// import components
	import Header from './Header.svelte';
	import Footer from './Footer.svelte';
</script>

<section class="todoapp">
	<Header />
	<section class="main">
		<input id="toggle-all" class="toggle-all" type="checkbox" />
		<label for="toggle-all">Mark all as complete</label>
		<ul class="todo-list">
			<li class="completed">
				<div class="view">
					<input class="toggle" type="checkbox" checked />
					<label>Taste JavaScript</label>
					<button class="destroy" />
				</div>
				<input class="edit" value="Create a TodoMVC template" />
			</li>
			<li>
				<div class="view">
					<input class="toggle" type="checkbox" />
					<label>Buy a unicorn</label>
					<button class="destroy" />
				</div>
				<input class="edit" value="Rule the web" />
			</li>
		</ul>
	</section>
	<Footer />
</section>
We are now ready to add Firebase + RxFire into the mix.
Writing the business logic#
Let's start writing the business logic. First, we need to install RxJS and RxFire.
$ npm add -D rxjs rxfireTo keep things simple we will keep all todos in a todos Firestore collection.
Next, we need to think about the data structure of a todo item.
interface Todo {
  id: string;
  action: string;
  completed: boolean;
  createdAt: firebase.firestore.Timestamp;
}
That will do. The timestamp is needed for sorting todos by time.
Create a file src/todos.ts with the following code.
// todos.ts

import { db } from './firebase';
import firebase from 'firebase/app';
import 'firebase/firebase-firestore';
import { collectionData } from 'rxfire/firestore';
import { startWith } from 'rxjs/operators';

const timestamp = firebase.firestore.FieldValue.serverTimestamp;

interface Todo {
  id: string;
  action: string;
  completed: boolean;
  createdAt: firebase.firestore.Timestamp;
}

// todos Firebase collection reference
const todoCollection = db().collection('todos');

// rxfire wrapped collection
export const todos = collectionData(
  todoCollection.orderBy('createdAt', 'desc'),
  'id'
).pipe(startWith([]));
That's the base. You see that we have a startWith operator. It's required for Svelte's each template directive to work. We provide it with an initial empty list on start. The empty list will be replaced by the actual Firebase data right after.
Adding new item#
Next step is to create a function to add new item to the list.
// todos.ts

export const createTodo = async (action: string) => {
	// guard function to check if todo is not empty
  if (!action) return;
  await todoCollection.add({ action, completed: false, createdAt: timestamp() });
};
We now have all the business logic in place to create at new todo item. Let's put it to use.
Open Header.svelte and replace it with the following code.
<!-- Header.svelte -->

<script>
  import { onMount } from 'svelte';
  import { createTodo } from './todos';

  let action = '';
  // input field element reference
  let ref = null;

  onMount(() => {
    // focus the input field on app load
    ref.focus();
  });

  const createHandler = async () => {
    if (!action) return;
    await createTodo(action);
    action = '';
  };
</script>

<header class="header">
  <h1>todos</h1>
  <form on:submit|preventDefault={createHandler}>
    <input
      class="new-todo"
      type="text"
      bind:value={action}
      bind:this={ref}
      placeholder="What needs to be done?"
    />
  </form>
</header>
Nothing complicated. We bind the input's value to the action variable and when the form is submitted we call our createTodo function and reset the action variable.
According to the TodoMVC specification the input field must have focus when the app is loaded. We achieved that by using Svelte's onMount lifecycle event.
One trick I like to use when developing is to JSON stringify output on page. I know, poor man's debuging, but it's nice to see data visually when developing.
<!-- App.svelte -->

<script>
	// ...
	import { todos } from './todos';
</script>

Add this line at the end of the file

<pre>{JSON.stringify($todos, null, 2)}</pre>
It should now be possible to create new todo items and see them serialized as JSON on the page.
When we add a new item to Firebase collection, RxFire notices it and refreshes the list for us.
You might have noticed that we prefixed our todos RxFire observable with a dollar sign - $todos. The reason it works is that RxJS observables have a subscribe method on them and Svelte treats them as plain readable Svelte stores.
Extracting the item component#
Now we need to extract the individual item component. Create a Todo.svelte in the src directory with the following code.
<!-- Todo.svelte -->

<script>
  export let todo;
  $: completed = todo && todo.completed;
</script>

<li class:completed>
  <div class="view">
    <input class="toggle" type="checkbox" checked />
    <label>{todo.action}</label>
    <button class="destroy" />
  </div>
  <input class="edit" value="Create a TodoMVC template" />
</li>
You can see that we will pass a todo item to the component and we also created a computed property called completed that we use in CSS logic - class:completed. It might look weird, but that's a Svelte shortcut for working with CSS classes.
The reason we extracted component together with an li HTML element is that we need to be able to set CSS classes on it.
We now need to adjust our App.svelte component, by introducing an each loop. Also, according to TodoMVC spec, the main section should be hidden when there are no todo items.
<!-- App.svelte -->

<script>
	// import TodoMVC stylesheets
	import './base.css';
	import './index.css';

	// import components
	import Header from './Header.svelte';
	import Footer from './Footer.svelte';

	// import Todo component
	import Todo from './Todo.svelte';

	import { todos } from './todos';
</script>

<section class="todoapp">
	<Header />

	<!-- display only if there are todo items -->
	{#if $todos.length}
		<section class="main">
			<input id="toggle-all" class="toggle-all" type="checkbox" />
			<label for="toggle-all">Mark all as complete</label>
			<ul class="todo-list">
				<!-- iterate over todos stream -->
				{#each $todos as todo (todo.id)}
					<Todo {todo} />
				{/each}
			</ul>
		</section>
	{/if}

	<Footer />
</section>

<pre>{JSON.stringify($todos, null, 2)}</pre>
Cool! We can now see todo items when we add them.
Toggling an item#
Let's implement the toggling of the individual item.
For that we need to add a toggle function to our todos.ts.
// todos.ts

export const toggleTodo = async (todo: Todo) => {
  await todoCollection.doc(todo.id).update({ completed: !todo.completed });
};
And also add the following code to our Todo.svelte component.
<!-- Todo.svelte -->

<script>
  import { toggleTodo } from './todos';

  export let todo;
  $: completed = todo && todo.completed;
</script>

<li class:completed>
  <div class="view">
    <input
      class="toggle"
      type="checkbox"
      checked={todo.completed}
      on:change={() => toggleTodo(todo)}
    />
    <label>{todo.action}</label>
    <button class="destroy" />
  </div>
  <input class="edit" value="Create a TodoMVC template" />
</li>
We imported our toggleTodo function and wired it up to Svelte's on:change event.
Now you can toggle your heart out if you want and everything is synced to Firestore.
Deleting an item#
Deleting an item is almost the same.
// todos.ts

export const deleteTodo = async (todo: Todo) => {
  await todoCollection.doc(todo.id).delete();
};
The deleteTodo function should be self-explanatory.
<!-- Todo.svelte -->

<script>
  import { deleteTodo, toggleTodo } from './todos';

  export let todo;
  $: completed = todo && todo.completed;
</script>

<li class:completed>
  <div class="view">
    <input
      class="toggle"
      type="checkbox"
      checked={todo.completed}
      on:change={() => toggleTodo(todo)}
    />
    <label>{todo.action}</label>
    <button class="destroy" on:click={() => deleteTodo(todo)} />
  </div>
  <input class="edit" value="Create a TodoMVC template" />
</li>
And we can delete the items too. Half way now.
Editing an item#
We have now come to the most complex part of the application. Editing a todo item.
The editing business logic is straight forward.
// todos.ts

export const updateTodo = async (id: string, action: string) => {
  if (action.trim()) await todoCollection.doc(id).update({ action });
};
The UI part, not so much. The spec says when you double click an item it should toggle the editing mode on and focus the input field. We should also revert the changes if the user clicks outside the form or hits the Escape key.
Double clicking is not a problem, Svelte has on:dblclick event handler, nor are the other requirements that can be satisfied with on:blur and on:keyup events.
What took the most time was to figure out how to focus the input field. For that we need a reference to the input element and keep track if the component is in "editing" mode. Only then we should focus the input element.
I tried to use Svelte's action directive, but failed, so I ended up using Svelte's afterUpdate lifecycle event.
Sounds complicated, let's put words into code. This is our updated Todo.svelte component. I've added explaining comments in the right places.
<!-- Todo.svelte -->

<script>
  import { afterUpdate } from 'svelte';
  import { deleteTodo, toggleTodo, updateTodo } from './todos';

  export let todo = null;
  // keep action in own variable. needed for reverting editing changes
  let action = todo.action;
  // editing state
  let editing = false;
  // reference to the input field
  let ref = null;

  const updateHandler = async () => {
    await updateTodo(todo.id, action);
    // turn off editing state
    editing = false;
  };

  const editHandler = () => {
    // turn on editing state
    editing = true;
    // copy todo item's action
    action = todo.action;
  };

  // handler for blur and keyup events
  const doneEditing = event => {
    // if match, turn off editing state
    if (event.type === 'blur' || event.key === 'Escape') editing = false;
  };

  afterUpdate(() => {
    // focus input field if component is in edit mode
    if (editing) {
      ref.focus();
    }
  });

  $: completed = todo.completed;
</script>

<li class:completed class:editing>
  {#if editing}
    <form on:submit|preventDefault={updateHandler}>
      <input
        bind:this={ref}
        class="edit"
        type="text"
        on:blur={doneEditing}
        on:keyup={doneEditing}
        bind:value={action}
      />
    </form>
  {:else}
    <div class="view">
      <input
        class="toggle"
        type="checkbox"
        checked={todo.completed}
        on:change={() => toggleTodo(todo)}
      />
      <label on:dblclick={editHandler}>{todo.action}</label>
      <button class="destroy" on:click={() => deleteTodo(todo)} />
    </div>
  {/if}
</li>
This was the hardest part to implement and I am not sure I've done it in the most efficient way possible, because we re-focus the input field on every keypress when component is in edit mode. But hey, it works!
Implementing filtering#
This is the fun part of the app and the part where RxJS really shines.
First, we need to create a filter observable. Its job will be to keep track of the current view.
RxJS BehaviourSubject is perfect for the job. We can initialize it with a default value and it will always return its latest state to us.
// todos.ts

import { BehaviorSubject } from 'rxjs';

// default value is 'all' todos
const todoFilter = new BehaviorSubject('all');

// Export the Subject's next function as setFilter
export const setFilter = todoFilter.next.bind(todoFilter);
For the filter to be useful we need to create a few filter functions. We will keep them in a dictionary.
// todos.ts

const filters = {
  completed: (todo: Todo) => todo.completed,
  active: (todo: Todo) => !todo.completed,
  all: (todo: Todo) => todo
};
We need to be able to show completed, active and all todo items. For that we can create two RxJS sub-streams. Think of them as of Svelte's derived stores.
We can use the filter functions we defined earlier. Don't forget to import map operator from rxjs/operators.
// todos.ts

export const completedTodos = todos.pipe(
  map(todos => todos.filter(filters.completed))
);

// active todos stream
export const activeTodos = todos.pipe(
  map(todos => todos.filter(filters.active))
);
Next, we will concentrate on our Svelte filter component. The TodoMVC spec dictates that filter footer should only be visible if there are any todo items and the "items left" indicator should respect singular and plural.
Here we will deviate from the TodoMVC spec a bit, because we are not using any routing library, so we will use good old radio buttons instead of links.
For the filtering and "items left" indicator we will use Svelte's computed properties as they are a perfect candidate for the job.
Enough talking. Here is the annotated code for the Footer.svelte component.
<!-- Footer.svelte -->

<script>
  import { todos, activeTodos, setFilter } from './todos';

  let filterValue = 'all';

  // every time the filterValue changes we call our setFilter function
  $: setFilter(filterValue);
  // auto-computed pluralization
  $: itemsLabel = $activeTodos.length === 1 ? 'item' : 'items';
</script>

{#if $todos.length}
  <footer class="footer">
    <span class="todo-count">
      <strong>{$activeTodos.length}</strong>
      {itemsLabel} left
    </span>
    <ul class="filters">
      <li>
        <label>
          <input name="filter" type="radio" bind:group={filterValue} value="all" />
          all
        </label>
      </li>
      <li>
        <label>
          <input name="filter" type="radio" bind:group={filterValue} value="active" />
          active
        </label>
      </li>
      <li>
        <label>
          <input name="filter" type="radio" bind:group={filterValue} value="completed" />
          completed
        </label>
      </li>
    </ul>
    <button class="clear-completed">Clear completed</button>
  </footer>
{/if}
You should now be able to see the working remaining items indicator, but when we change filter options nothing is happening. This is expected as we need to create another RxJS stream for that.
Creating a filtered view#
When the filter changes we need to filter our items on their completed status. We already have filter functions and a filter. Let's implement the actual stream.
For that we need to use a combineLatest observable. It's pretty straight forward. You give it a number of streams and it will emit them all to a function we specify when any of the supplied stream emits. Here is how it looks.
// todos.ts
import { BehaviorSubject, combineLatest } from 'rxjs';

export const filteredTodos = combineLatest(todos, todoFilter).pipe(
  map(([todos, filter]) => {
     // filter todos on current filter, default to all if not found
    return todos.filter(filters[filter] || filters.all);
  })
);
Now, we need to use our new filteredTodo stream in our App.svelte. Import it form todos.ts first and replace $todos with the $filteredTodos stream.
	<ul class="todo-list">
		<!-- iterate over filteredTodos stream -->
		{#each $filteredTodos as todo (todo.id)}
			<Todo {todo} />
		{/each}
	</ul>
Voila! We have now implemented a filtered view! Change the filters and admire your work.
Clearing completed items#
We are almost done. Only two features left to implement. One of them is clearing all completed items. No need to involve RxJS. Raw Firebase library will do.
// todos.ts

export const clearCompleted = async () => {
  // query reference to all completed todo items
  const completed = await todoCollection.where('completed', '==', true).get();

  // loop over items and delete each one
  completed.forEach(async doc => {
    await todoCollection.doc(doc.id).delete();
  });
};
And now we need to import the function in our Footer.svelte component and wire it to the "Clear completed" button.
<!-- Footer.svelte -->

<button class="clear-completed" on:click={clearCompleted}>Clear completed</button>
That was easy, right?
Marking all items complete#
Last thing we need to do according to the TodoMVC spec is to toggle all items as complete when we click the arrow to the left of the create action field.
It's actually a hidden checkbox and we can use its checked value as an indicator and pass it into our status modifier function that looks like this.
// todos.ts

export const checkAll = async (completed: boolean) => {
  // get reference to all todo items
  const allTodos = await todoCollection.get();

  allTodos.forEach(async doc => {
    // change the item status if not the same as supplied
    if (doc.data().completed !== completed) {
      await todoCollection.doc(doc.id).update({ completed });
    }
  });
};
The checkbox should also become checked if all items are complete. Again, we can use the power of Svelte's computed variables.
Here is the final version of App.svelte component in all its glory.
<!-- App.svelte -->

<script>
  import './base.css';
  import './index.css';

  import Header from './Header.svelte';
  import Footer from './Footer.svelte';
  import Todo from './Todo.svelte';

  import { todos, filteredTodos, completedTodos, markAll } from './todos';

  // on:change handler
  const markAll = event => {
    checkAll(event.target.checked);
  };

  // used for checkbox auto status
  $: allCompleted = $todos.length === $completedTodos.length;
</script>

<section class="todoapp">
  <Header />

  <!-- display only if there are todo items -->
  {#if $todos.length}
    <section class="main">
      <input
        on:change={markAll}
        id="toggle-all"
        class="toggle-all"
        checked={allCompleted}
        type="checkbox"
      />
      <label for="toggle-all">Mark all as complete</label>
      <ul class="todo-list">
        <!-- iterate over filteredTodos stream -->
        {#each $filteredTodos as todo (todo.id)}
          <Todo {todo} />
        {/each}
      </ul>
    </section>
  {/if}

  <Footer />

</section>

<pre>{JSON.stringify($todos, null, 2)}</pre>
All our requirements are now implemented, which means we are done!
Test drive the app and pat yourself on the shoulder for a job well done!
Recap#
That was a fun exercise. If you followed along you should have learned:
- How to use RxJS with Firebase Firestore
- How to use RxJS with Svelte
- How to use RxJS with Typescript
- How to keep business logic outside Svelte
- The power of Svelte's computed variables
The most painful feature to implement was the edit form autofocus, when the item enters the edit state. I am still not sure if I've done it correctly. But it works and that's the most important.
Remember: your users don't care if your code is linted, tested or uses the right abstractions. They just want to get things done and move on with their life.
I am, of course, joking, but there is some truth in every joke. Linting and testing helps you gain the confidence of shipping things that work faster, but it's also dangerous. I've been burned by it so many times. It's very easy to get ignorant and over-confident and start relying on your automated tests too much.
As always, here is the full code (for those of you too lazy to type):
https://github.com/codechips/svelte-firebase-rxjs-todo-app
This was a long article. If you made it this far, and actually wrote the code on the way, like typed it out on your keyboard, you hopefully learned a lot.
Thank you for reading!