Firebase authentication with Svelte
Learn how build Firebase authentication in Svelte.
Most apps need some kind of authentication, but authentication is hard to get right. You can either do it yourself or use an off-the-shelf solution. The most popular ones are Google Firebase and Auth0. Both are free to use for smaller apps.
In this article we will explore Firebase Authentication. If you want to know how to use Auth0 I've written an article on the topic - Svelte Auth0 integration in 66 LOC.
Some of the things you will learn:
- How to wrap Firebase Authentication in a pure Svelte component
- How to use Svelte slots
- How to expose a slot's properties
- How to keep business logic outside Svelte
- How to use Svelte's readable stores
- How to use Svite bundler with Tailwind CSS
No time to waste. Let's get started!
The Setup#
For this experiment I decided to try a new Svelte bundler - Svite. I will also use Tailwind CSS because I want to see how good Svite works with PostCSS, plus Tailwind CSS blog-friendly. It lets you concentrate on the actual problem and not writing CSS.
Here are the commands needed to bootstrap our project.
$ npx svite create svelte-firebase-auth-example
$ cd svelte-firebase-auth-example
$ npm add -D firebase tailwindcss postcss svelte-preprocess postcss-preset-env
$ npx tailwindcss init
We also need to create a PostCSS config in the root directory.
// postcss.config.js

module.exports = {
  plugins: [
    require('postcss-import'),
    require('tailwindcss')(),
    require('postcss-preset-env')({ stage: 1 }),
  ],
};
And tell Tailwind to purge unused CSS classes on production builds.
// tailwind.config.js

module.exports = {
  purge: ['./src/**/*.svelte'],
  theme: {
    extend: {},
  },
  variants: {},
  plugins: [],
}
Next, we need to create a Tailwind CSS file in src directory.
/* index.css */

@import 'tailwindcss/base.css';
@import 'tailwindcss/components.css';
@import 'tailwindcss/utilities.css';
And import it into our app.
// index.js

import App from './App.svelte';
import './index.css';

const app = new App({
  target: document.body,
});

export default app;
We also need to tell our editor on how to process Svelte files with PostCSS (Tailwind) in them.
For that we need to create a svelte.config.js file.
// svelte.config.js
const { postcss } = require('svelte-preprocess');
module.exports = {
preprocess: [postcss()]
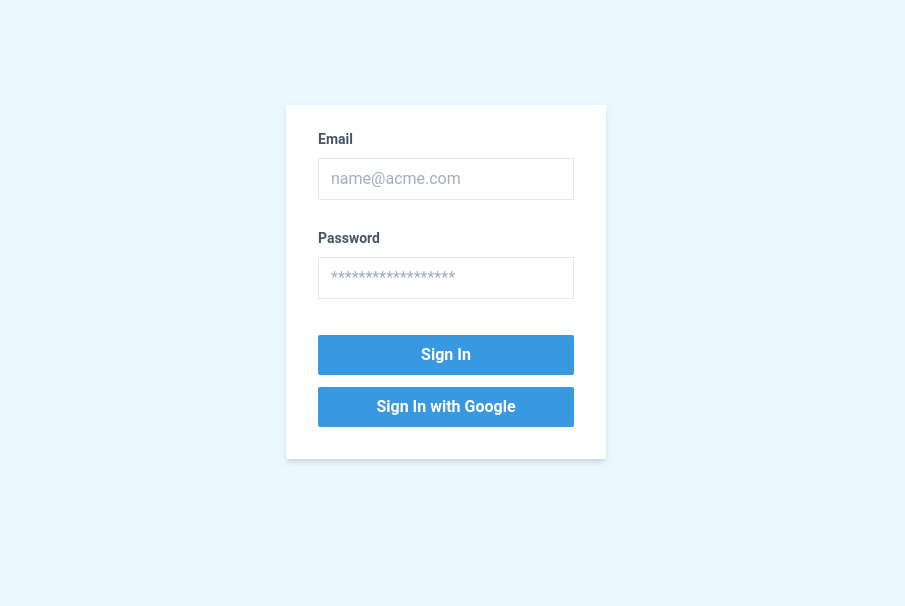
};We are finally ready to build our login form. For this example I chose to borrow most of the markup from Tailwind's own login form example.
<!-- App.svelte -->

<style lang="postcss">
  label {
    @apply block mb-2 text-sm font-bold text-gray-700;
  }
  .input-field {
    @apply border w-full py-2 px-3 text-gray-700 mb-3;
  }
  .input-field:focus {
    @apply shadow-outline outline-none;
  }
  button {
    @apply w-full px-4 py-2 font-bold text-white bg-blue-500 rounded-sm;
  }
  button:hover {
    @apply bg-blue-700;
  }
  button:focus {
    @apply outline-none shadow-outline;
  }
  .wrapper {
    @apply flex flex-grow h-screen justify-center items-center bg-blue-100;
  }
</style>

<div class="wrapper">
  <div class="w-full max-w-xs">
    <form class="px-8 pt-6 pb-8 bg-white shadow-md">
      <div class="mb-4">
        <label for="email">Email</label>
        <input
          class="input-field"
          id="email"
          type="text"
          placeholder="name@acme.com"
        />
      </div>
      <div class="mb-6">
        <label for="password">Password</label>
        <input
          class="input-field"
          id="password"
          type="password"
          placeholder="******************"
        />
      </div>
      <div class="">
        <button type="submit">Sign In</button>
      </div>
      <div class="mt-3">
        <button type="button">Sign In with Google</button>
      </div>
    </form>
  </div>
</div>
Notice that I added a lang="postcss" attribute to the style tag. That is required for the code editor to understand that it's dealing with PostCSS and not pure CSS. I think that you can also use type="postcss" to achieve the same result.
If you did everything correctly the result should look like this.
We are now ready to write some authentication logic, but before we start we need talk a little about Firebase Authentication.
Firebase Authentication Explained#
Before we start, we need to create an app in the Firebase Console if you haven't done that already.
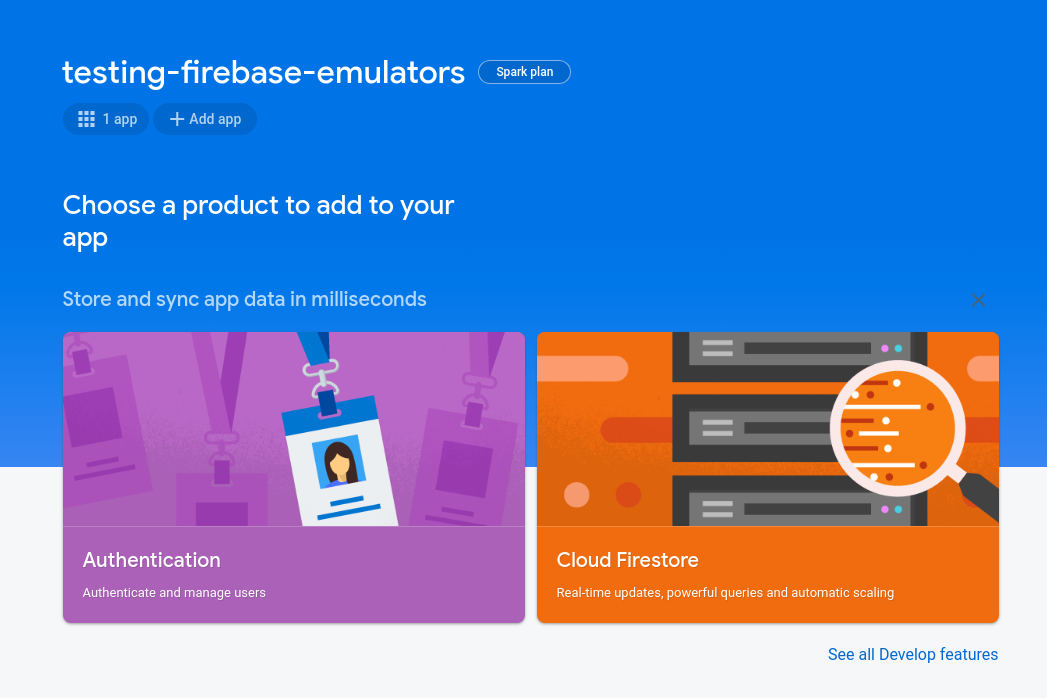
Assuming you already created a project, go to Firebase project and you should see an "Add app" button right below the project title. Create a new app, choose web, complete the process and the result will be a Firebase config code snippet.
Save it, because we are going to need it soon.
Next, we need to enable Firebase authentication. There are quite a few different options available, but we will only enable email/password and Google, because they work out of the box.
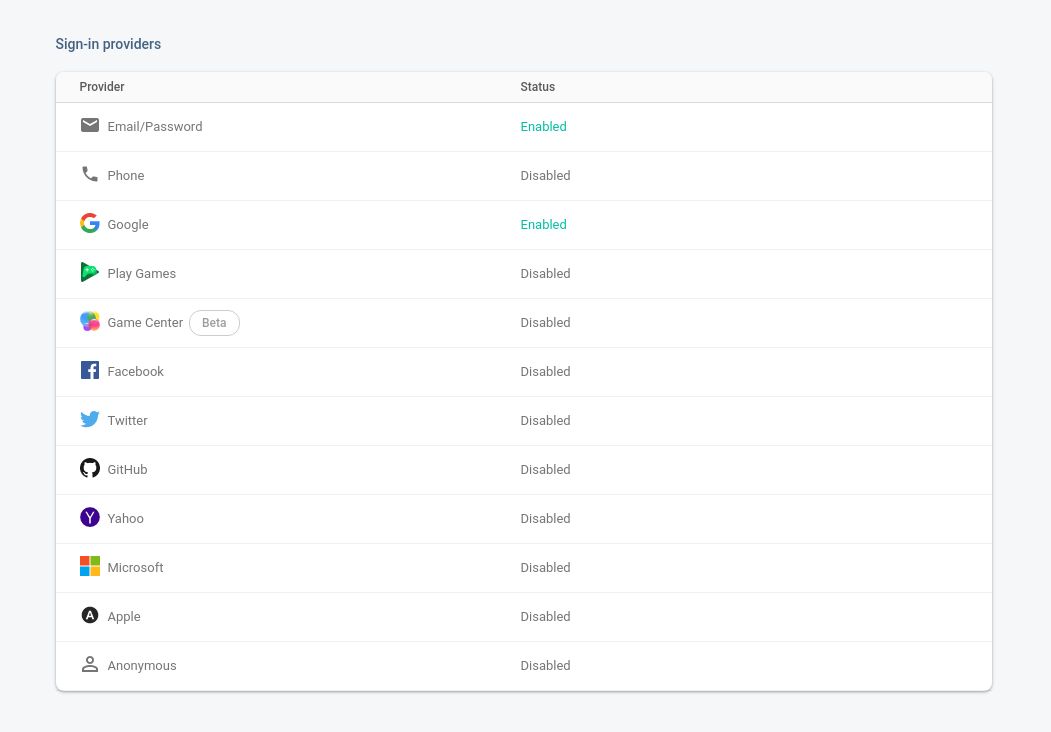
We also need to create a Firebase user that we will use to test our email and password authentication. You can find it in the Authentication section.

Done? Good! Because we need to talk about how Firebase authentication works.
Firebase Initialization
I often find it easier to look at the code than reading about how the code works. Below is the annotated code that explains how Firebase authentication works and what methods we will use.
// import firebase app (required)
import firebase from 'firebase/app';
// firebase auth mixin (required for every firebase feature)
import 'firebase/auth';

// firebase config with non-auth properties skipped
const firebaseConfig = {
  apiKey: 'firebase-api-key',
  authDomain: 'testing-firebase-emulators.firebaseapp.com',
  projectId: 'testing-firebase-emulators',
};

// initialize firebase app. required as first step
firebase.initializeApp(firebaseConfig);

// get the firebase auth object
const auth = firebase.auth();
We are now ready to use Firebase authentication.
Firebase Authentication Methods
Since this article is only about Firebase authentication we will skip the registration, password reset and other features and concentrate only on login and logout logic.
Below are the Firebase authentication methods we are going to use.
// a promise that returns an error in case of error
// or nothing in case of success
auth.signInWithEmailAndPassword('email@example.com', 'qwerty');

// sign-in with Google provider
// same concept for Github, Twitter, etc
const google = new firebase.auth.GoogleAuthProvider();

// redirect to Googles login page
auth.signInWithRedirect(google);

// show a login popup without leaving the app
auth.signInWithPopup(google);

// logout promise. clear firebase auth cookies, etc
auth.signOut();

// Firebase listener that fires when auth state changes.
// Will be fired on login, logout and also check and fire
// when you load or reload the page
auth.onAuthStateChanged(auth => {
  // if user is not logged in the auth will be null
  if (auth) {
    console.log('logged in');
  } else {
    console.log('not logged in');
  }
});
The most important concept to understand is that Firebase authentication is decoupled from the login/logut actions. When you login, Firebase onAuthStateChanged listener will be fired and it's in that code block that you must perform your specific app logic. Such as loading user data, redirecting to another page, etc.
Doing it The Svelte Way#
I've noticed that people in Svelte community often like to write code The Svelte Way. What do I mean by that? They tend to keep the logic in Svelte components instead of external JS or TS files. Let's try that and see how it turns out.
We will start by creating an Auth.svelte component that we will use in our main file. Svelte slot seems like a good solution to our problem. Let's use it.
<!-- Auth.svelte -->

<script>
  import firebase from 'firebase/app';
  import 'firebase/auth';

  const auth = firebase.auth();

  // Firebase user
  let user = null;

  // expose property on the component that we can use
  // to choose if we want use popup or redirect
  export let useRedirect = false;

  // small mapper function
  const userMapper = claims => ({
    id: claims.user_id,
    name: claims.name,
    email: claims.email,
    picture: claims.picture
  });

  export const loginWithEmailPassword = (email, password) =>
    auth.signInWithEmailAndPassword(email, password);

  export const loginWithGoogle = () => {
    const provider = new firebase.auth.GoogleAuthProvider();

    if (useRedirect) {
      return auth.signInWithRedirect(provider);
    } else {
      return auth.signInWithPopup(provider);
    }
  };

  export const logout = () => auth.signOut();

  // will be fired every time auth state changes
  auth.onAuthStateChanged(async fireUser => {
    if (fireUser) {
      // in here you might want to do some further actions
      // such as loading more data, etc.

      // if you want to set custom claims such as roles on a user
      // this is how to get them because they will be present
      // on the token.claims object
      const token = await fireUser.getIdTokenResult();
      user = userMapper(token.claims);
    } else {
      user = null;
    }
  });

  // reactive helper variable
  $: loggedIn = user !== null;
</script>

<!-- we will expose all required methods and properties on our slot -->
<div>
  <slot {user} {loggedIn} {loginWithGoogle} {loginWithEmailPassword} {logout} />
</div>
Now, let's turn our attention to our main file App.svelte.
<!-- App.svelte with styles omitted -->

<script>
  import firebase from 'firebase/app';
  import Auth from './Auth.svelte';

  const firebaseConfig = {
    apiKey: 'firebase-api-key',
    authDomain: 'testing-firebase-emulators.firebaseapp.com',
    projectId: 'testing-firebase-emulators'
  };

  firebase.initializeApp(firebaseConfig);
</script>

<div class="wrapper">
  <Auth
    useRedirect={true}
    let:user
    let:loggedIn
    let:loginWithGoogle
    let:loginWithEmailPassword
    let:logout
  >
    {#if loggedIn}
      <div class="w-full max-w-xs">
        <div class="text-center">
          <h2>{user.email}</h2>
          <button type="button" class="mt-3" on:click={logout}>Logout</button>
        </div>
      </div>
    {:else}
      <div class="w-full max-w-xs">
        <form
          class="px-8 pt-6 pb-8 bg-white shadow-md"
        >
          <div class="mb-4">
            <label for="email">Email</label>
            <input
              class="input-field"
              id="email"
              type="email"
              placeholder="name@acme.com"
            />
          </div>
          <div class="mb-6">
            <label for="password">Password</label>
            <input
              class="input-field"
              id="password"
              type="password"
              placeholder="******************"
            />
          </div>
          <div>
            <button type="submit">Sign In</button>
          </div>
          <div class="mt-3">
            <button type="button" on:click|preventDefault={loginWithGoogle}>
              Sign In with Google
            </button>
          </div>
        </form>
      </div>
    {/if}
  </Auth>
</div>
This is how our main file looks now. Svelte slots let us use their exposed properties by the let:property directive.
All good, but there is a small problem. We need to access loginWithEmailPassword function outside slot's scope.
We need to use it in our login form handler and also check for potential login errors.
Slot's properties are only available inside its scope, but we can change the let:loginWithEmailPassword to a bind:loginWithEmailPassword and in that way bind it to a local variable.
It works because we prefixed that function with export statement in our Auth.svelte component.
While we are on it we will also create our login form handler and add an error message. We will also use Svelte's fade transition just for fun.
Here is the full code with style still omitted.
<!-- App.svelte -->

<script>
  import firebase from 'firebase/app';
  import Auth from './Auth.svelte';
  import { fade } from 'svelte/transition';

  const firebaseConfig = {
    apiKey: 'firebase-api-key',
    authDomain: 'testing-firebase-emulators.firebaseapp.com',
    projectId: 'testing-firebase-emulators'
  };

  firebase.initializeApp(firebaseConfig);

  let loginWithEmailPassword;
  let error = null;

  const loginHandler = async event => {
    const { email, password } = event.target.elements;
    try {
      error = null;
      await loginWithEmailPassword(email.value, password.value);
    } catch (err) {
      error = err;
    }
  };
</script>

<div class="wrapper">
  <Auth
    useRedirect={true}
    let:user
    let:loggedIn
    let:loginWithGoogle
    bind:loginWithEmailPassword
    let:logout
  >
    {#if loggedIn}
      <div class="w-full max-w-xs">
        <div class="text-center">
          <h2>{user.email}</h2>
          <button type="button" class="mt-3" on:click={logout}>Logout</button>
        </div>
      </div>
    {:else}
      <div class="w-full max-w-xs">
        <form
          on:submit|preventDefault={loginHandler}
          class="px-8 pt-6 pb-8 bg-white shadow-md"
        >
          <div class="mb-4">
            <label for="email">Email</label>
            <input
              class="input-field"
              id="email"
              type="email"
              placeholder="name@acme.com"
            />
          </div>
          <div class="mb-6">
            <label for="password">Password</label>
            <input
              class="input-field"
              id="password"
              type="password"
              placeholder="******************"
            />
          </div>
          {#if error}
            <div transition:fade class="p-2 mb-6 bg-red-300">{error.message}</div>
          {/if}
          <div>
            <button type="submit">Sign In</button>
          </div>
          <div class="mt-3">
            <button type="button" on:click|preventDefault={loginWithGoogle}>
              Sign In with Google
            </button>
          </div>
        </form>
      </div>
    {/if}
  </Auth>
</div>
Try it out and see that it works. Hint: it should.
I don't know about you, but even if it works, the code feels a bit awkward to me.
Personally, I would not write authentication code directly in a Svelte file, but write it in a separate Javascript file.
Why don't we do that and then compare our solutions?
Redoing it the Javascript way#
As I said earlier, I prefer to keep as little logic as possible in Svelte files and instead try to use them as a thin view layer that binds everything together.
It helps me separate the business logic from the view and makes it easily testable. Here is how I would roughly write the authentication logic.
Create an auth directory in src directory and create an index.js file with the following code.
// auth/index.js

import firebase from 'firebase/app';
import 'firebase/auth';
import { readable } from 'svelte/store';

const userMapper = claims => ({
  id: claims.user_id,
  name: claims.name,
  email: claims.email,
  picture: claims.picture
});

// construction function. need to call it after we
// initialize our firebase app
export const initAuth = (useRedirect = false) => {
  const auth = firebase.auth();

  const loginWithEmailPassword = (email, password) =>
    auth.signInWithEmailAndPassword(email, password);

  const loginWithGoogle = () => {
    const provider = new firebase.auth.GoogleAuthProvider();

    if (useRedirect) {
      return auth.signInWithRedirect(provider);
    } else {
      return auth.signInWithPopup(provider);
    }
  };

  const logout = () => auth.signOut();

  // wrap Firebase user in a Svelte readable store
  const user = readable(null, set => {
    const unsub = auth.onAuthStateChanged(async fireUser => {
      if (fireUser) {
        const token = await fireUser.getIdTokenResult();
        const user = userMapper(token.claims);
        set(user);
      } else {
        set(null);
      }
    });

    return unsub;
  });

  return {
    user,
    loginWithGoogle,
    loginWithEmailPassword,
    logout
  };
};
We also need to adjust our App.svelte a bit.
<!-- App.svelte with style ommited -->

<script>
  import firebase from 'firebase/app';
  import { initAuth } from './auth';
  import { fade } from 'svelte/transition';

  const firebaseConfig = {
    apiKey: 'firebase-api-key',
    authDomain: 'testing-firebase-emulators.firebaseapp.com',
    projectId: 'testing-firebase-emulators'
  };

  firebase.initializeApp(firebaseConfig);

  const { loginWithEmailPassword, loginWithGoogle, logout, user } = initAuth();

  let error = null;

  const loginHandler = async event => {
    const { email, password } = event.target.elements;
    try {
      error = null;
      await loginWithEmailPassword(email.value, password.value);
    } catch (err) {
      error = err;
    }
  };
</script>

<div class="wrapper">
  {#if $user}
    <div class="w-full max-w-xs">
      <div class="text-center">
        <h2>{$user.email}</h2>
        <button type="button" class="mt-3" on:click={logout}>Logout</button>
      </div>
    </div>
  {:else}
    <div class="w-full max-w-xs">
      <form
        on:submit|preventDefault={loginHandler}
        class="px-8 pt-6 pb-8 bg-white shadow-md"
      >
        <div class="mb-4">
          <label for="email">Email</label>
          <input
            class="input-field"
            id="email"
            type="email"
            placeholder="name@acme.com"
          />
        </div>
        <div class="mb-6">
          <label for="password">Password</label>
          <input
            class="input-field"
            id="password"
            type="password"
            placeholder="******************"
          />
        </div>
        {#if error}
          <div transition:fade class="p-2 mb-6 bg-red-300">{error.message}</div>
        {/if}
        <div>
          <button type="submit">Sign In</button>
        </div>
        <div class="mt-3">
          <button type="button" on:click|preventDefault={loginWithGoogle}>
            Sign In with Google
          </button>
        </div>
      </form>
    </div>
  {/if}
</div>
We've now switched to the new JS-only solution and everything should work just as before.
Conclusion#
By now you should know how to use Firebase authentication in Svelte in two different ways. The Svelte way and the JS way. Only you can answer which one feels more intuitive to you.
As for me, I find it more convenient to keep most of my logic out of Svelte. Call me old school.
But, there is one thing bothering me. The whole authentication process feels binary. You are either logged in or you are not.
It also looks weird when you first load the page or reload it. You start with the login form, but when the authentication listener kicks in and sees that you are logged in, the login form disappears. Not a good user experience.
An authentication flow in real app has many states like authenticating, signed in, signed out, signing in, signing out, loading user data, etc.
Wouldn't it be nice if we could somehow show the user the current authentication state she is in?
The good news is that we can. We can do it with the help of a small (and awesome) state library called XState.
That will be the topic for my next article. We will pick up where we left off and gently explore XState's capabilities to see if it can help us enhance our current authentication flow and make it more robust.