Awesome form validation with Vest and Svelte
Vest.js has become my go-to library when dealing with form validation
When it comes to form validation I am a big fan of Vest validation library. It's modular, flexible and half the size of Yup. It also takes a slightly different approach to validation. If you ever written tests in Jest or Mocha before you will feel right at home.
I saw on its website that there was no Svelte example and I decided to fix it. Said and done. I ported its React async validation example to Svelte. This is what the final form looks like.
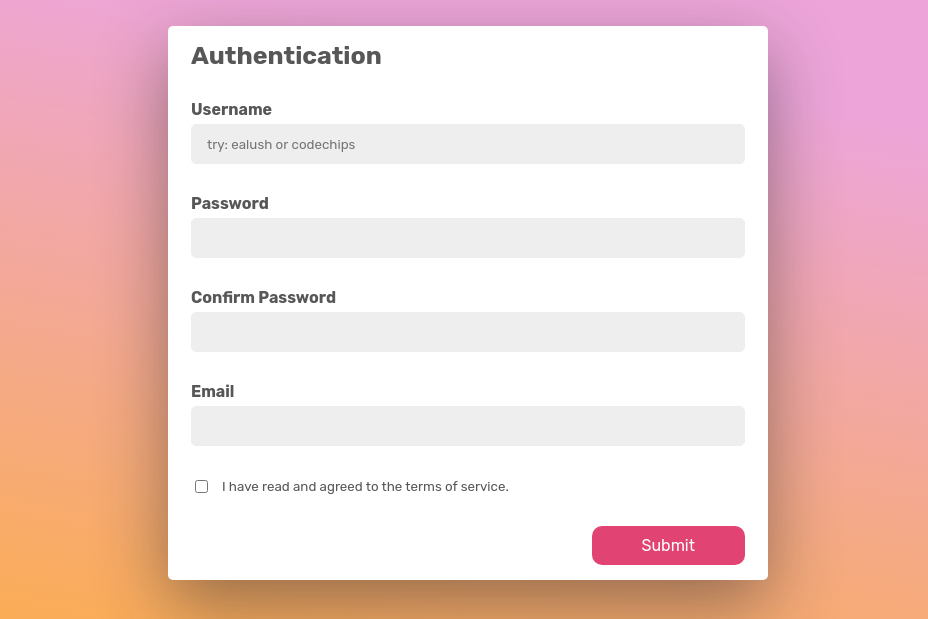
And here is how I did it.
Project setup with Vite.js 2#
If you just want to see the code you can skip to the next section, but if you want to follow along we need to setup a new Svelte project. Vite v2 came out recently and I decided to give it a spin. Apparently it supports Rollup plugins out of the box. This means we can use Svelte's Rollup plugin.
Let's set it up.
# pick vanilla JS template
$ npm init @vitejs/app
Switch to the project folder and add Svelte and Svelte Rollup HMR plugin. Since this is a port of the official React example we will reuse its SASS style file. Vite supports PostCSS and SASS out of the box. We just need to install the right dependency.
$ npm add -D sass rollup-plugin-svelte-hot svelte svelte-preprocessWe also need to teach Vite how to deal with Svelte files. For that we need to create a Vite config file.
// vite.config.js

import svelte from 'rollup-plugin-svelte-hot'

export default {
  plugins: [svelte()]
}
Create a src folder in the project directory and move the main.js to it. Make sure to update the script reference in index.html file to point to'/src/main.js'.
From now on it's business as usual to create Svelte files. Let's start with a simple App.svelte file that will use as base for our example. Create it in the src folder.
<!-- App.svelte -->

<h1>Svelte + Vite rocks!</h1>
Replace the contents of main.js with this.
// main.js

import App from './App.svelte'

const app = new App({
  target: document.getElementById('app')
})

export default app
Start the app with npm run dev. Works? Good! Then let us continue.
Short introduction to Vest#
Vest is a validation framework with a slightly different validation approach. Instead of writing your validations with with a DSL like in Yup, you write them as a suite of validation tests.
Here is a basic example of a Vest validation suite.
import vest, { test, enforce } from 'vest'
import { isEmail } from 'validator'

// extend Vest with email validator
enforce.extend({ isEmail })

const validate = vest.create('user_form', (data = {}, currentField) => {
	vest.only(currentField)

	test('email', 'Email is required', () => {
		enforce(data.email).isNotEmpty()
	})

	test('email', 'Email is not valid', () => {
		enforce(data.email).isEmail()
	})

	test('password', 'Password is required', () => {
		enforce(data.password).isNotEmpty()
	})

	if (data.password) {
		test('confirm_password', 'Passwords do not match', () => {
			enforce(data.confirm_password).equals(data.password)
		})
	}
})

let data = {
	email: 'johndoe',
	password: '',
	password_confirm: ''
}

const result = validate(data)

if (result.hasErrors()) {
	console.log(result.getErrors())
	// { email: ['Email is not valid'], password: ['Password is required'] }
}
We extend Vest with a custom email validator from validator.js. We also validate password_confirm field only if form values password field is not empty.
You can see that beside the data we pass additional currentField argument in the Vest callback. This allows to pass a specific field name, and if there are tests defined for it, Vest suite will run validations for that field only.
Vest has no opinions on how you write your validation suite. This allows us to model our form validation exactly how we need it.
This example was to only to show the basics of writing validation tests in Vest, but I've only scratched the surface of what's possible.
Creating authentication form#
Next, we need to create our registration form. I tried to keep the structure of the original React form as much as I could.
<!-- AuthForm.svelte -->

<script>
  import Input from './components/Input.svelte'
  import Button from './components/Button.svelte'
  import Checkbox from './components/Checkbox.svelte'

  export let values = {}
  export let submit = () => {}

  let errors = {}
  let warnings = {}

  // we copy the supplied for values to our form state
  // this is a good practice and helps us with resetting the form
  let formState = { ...values }

  // used as an indicator flag for async username availability check
  let usernamePending = false

  // form submit button status
	let disabled = true
</script>

<form on:submit|preventDefault={submit} id="example-form" class="col-xs-10 col-lg-6">
  <h2>Authentication</h2>
  <Input
    name="username"
    label="Username"
    pending={usernamePending}
    placeholder="try: ealush or codechips"
    {errors}
    bind:value={formState.username}
  />
  <Input
    name="password"
    label="Password"
    errors={{ ...errors, ...warnings }}
    bind:value={formState.password}
    onInput={check}
  />
  <Input
    name="confirm_password"
    label="Confirm Password"
    {errors}
    bind:value={formState.confirm_password}
  />
  <Input
    name="email"
    label="Email"
    {errors}
    bind:value={formState.email}
  />
  <Checkbox
    name="tos"
    label="I have read and agreed to the terms of service."
    bind:checked={formState.tos}
  />
  <footer>
    <Button class="btn-submit" type="submit" {disabled}>Submit</Button>
  </footer>
</form>
I've omitted the validation part for now, as we will add it later. Notice that I clone the original form values, supplied to the form component in the values property, into a formState object. I think it's overall good practice to follow. When working with forms you want to work on a copy of the original data. This also helps with form resets as you will see later.
We also re-bind our exported form component values in the main form. Another neat feature in Svelte.
Creating form components#
When it comes to form components I just ported them straight from React to Svelte.
<!-- components/Button.svelte -->

<script>
  export let type = 'button'
</script>

<button {type} {...$$props}>
  <slot />
</button>
Our button component contains a Svelte slot. This allows us to pass other Svelte components into it or other HTML elements that can make our buttons look more pretty, like adding a spinning submitting indicator icon.
<!-- components/Checkbox.svelte -->

<script>
  export let name = ''
  export let checked = false
  export let label = ''
  export let onChange = () => {}
</script>

<label class={`v-center ${$$props.class}`}>
  <input type="checkbox" {name} bind:checked on:change={onChange} />
  <small>{label}</small>
</label>
I like to always give the exported properties default values, so nothing blows up. This is especially true for input handlers. A noop (no operation) function is a way to go to keep JS interpreter happy.
<!-- components/Input.svelte -->

<script>
  export let value = ''
  export let label = ''
  export let name = ''
  export let pending = false
  export let errors = {}
  export let onInput = () => {}

  $: messages = errors[name] || []
</script>

<label class:pending class={$$props.class}>
  <div class="row">
    <strong class="col-xs-4">{label}</strong>
    {#if messages.length}
      <span class="col-xs-8 error-container">{messages[0]}</span>
    {/if}
  </div>
  <input type="text" {name} bind:value {...$$props} on:input={onInput} />
</label>
One good thing to know is that you cannot pass type as dynamic property to the input types when you use bi-directional bindings.
You can see that we have a cryptic $$props variable in the components. This magic variable is available in every Svelte component and allows you to pass in properties to the container that are not explicitly defined on it. If that doesn't make sense it will click when we will wire up validation to our form.
Writing Vest validation suite#
Let's setup some validation constraints for our registration form. From looking at the form we can see that our fields consists of username, email and password fields. We also have a Terms of Service checkbox that we need to consent to.
- Username - cannot be empty, must be at least 3 chars long and cannot be taken
- Email - cannot be empty, must be valid email
- Password - cannot be empty
- Password Confirm - must match password field
- Terms of Service - must agree to them
Beside errors Vest also supports warnings. Warnings are non-fatal and will let the validation suite pass. Their role is to advise, not hinder.
// validate.js

import vest, { test, enforce } from 'vest'
import { doesUserExist } from './api'
import { isEmail } from 'validator'

// extend vest with email validator
enforce.extend({ isEmail })

const suite = vest.create('user_form', (data = {}, currentField) => {
  // if field name is supplied validate only that field
  vest.only(currentField)

  test('username', 'Username is required', () => {
    enforce(data.username).isNotEmpty()
  })

  test('username', 'Username must be at least 3 characters long', () => {
    enforce(data.username).longerThanOrEquals(3)
  })

  if (!suite.get().hasErrors('username')) {
    // use memoization to reduce the number of API calls
    test.memo(
      'username',
      'Username already exists',
      () => {
        if (data.username) {
          return doesUserExist(data.username)
        }
      },
      [data.username]
    )
  }

  test('email', 'Email address is not valid', () => {
    enforce(data.email).isEmail()
  })

  test('password', 'Password is weak, Maybe add a number?', () => {
    // mark this test as a warning only
    vest.warn()
    enforce(data.password).matches(/[0-9]/)
  })

  if (data.password) {
    test('confirm_password', 'Passwords do not match', () => {
      enforce(data.confirm_password).equals(data.password)
    })
  }

  test('tos', () => {
    enforce(data.tos).isTruthy()
  })
})

export default suite
This validation suite is taken straight from the React example. The only new thing I added was the memoization feature of Vest. This helps reduce the number of call to the API when checking the username availability. Vest will remember all the checks we have done so far.
Notice that we don't do any API calls unless all other username checks pass. This is nice as it helps us reduce the number of unnecessary calls to the API.
Below is our fake username API check. It's a promise that resolves or rejects in case of failure.
// api.js

const usernames = ['ealush', 'codechips']

export const doesUserExist = username => {
  return new Promise((resolve, reject) => {
    setTimeout(() => {
      usernames.includes(`${username}`.toLowerCase()) ? reject() : resolve()
    }, 2000)
  })
}
I think that you can also reject it with an error if you want to show a custom error message.
Wiring up form field validation#
We have now come to the final step where we put all the pieces together. Vest has a small CSS class helper utility called classNames that we will use. Its job is to derive CSS class names from Vest validation result.
Svelte differs from React. Svelte keeps it's state in the component, it's stateful, while React is stateless. It re-renders its component DOM on every change. Therefore, for our classNames to work we need to make it reactive by using Svelte's reactive variable functionality. Every time Vest result reference changes it will re-trigger this reactive variable.
<!-- AuthForm.svelte -->

<script>
  import classNames from 'vest/classNames'
  import validate from './validate'

  import Input from './components/Input.svelte'
  import Button from './components/Button.svelte'
  import Checkbox from './components/Checkbox.svelte'

  export let values = {}
  export let submit = () => {}

  // our error and warnings state
  let errors = {}
  let warnings = {}

  // we copy the supplied for values to our form state
  // this is a good practice and helps us with resetting the form
  let formState = { ...values }

  let usernamePending = false

  // initial empty validation state
  let result = validate.get()

	// input check handler
  const check = ({ target: { name } }) => runValidate(name)

  // generic form validation function used in form submit callback
  // and individual form field validations
  const runValidate = name => {
    result = validate(formState, name)

    // extract errors and warnings
    errors = result.getErrors()
    warnings = result.getWarnings()

    // username validation is async and needs special treatment
    if (name === 'username') {
      usernamePending = true
      // for async validation we need to use the done hook
      result.done(() => {
        errors = result.getErrors()
        warnings = result.getWarnings()
        usernamePending = false
        // reassignment is needed for reactive cn statement
        result = result
      })
    }
  }

  const reset = () => {
    validate.reset()
    result = validate.get()
    errors = {}
    warnings = {}
    formState = { ...values }
  }

  const onSubmit = () => {
    runValidate()
    if (result.hasErrors()) return
    submit(formState)
    // reset form state
    reset()
  }

  // Vest CSS class helper utility
  $: cn = classNames(result, {
    warning: 'warning',
    invalid: 'invalid',
    valid: 'valid'
  })

  // reactive variable for the submit button
  $: disabled = result.hasErrors()
</script>

<form on:submit|preventDefault={onSubmit} id="example-form" class="col-xs-10 col-lg-6">
  <h2>Authentication</h2>
  <Input
    name="username"
    label="Username"
    pending={usernamePending}
    class={cn('username')}
    placeholder="try: ealush or codechips"
    {errors}
    bind:value={formState.username}
    onInput={check}
  />
  <Input
    name="password"
    label="Password"
    class={cn('password')}
    errors={{ ...errors, ...warnings }}
    bind:value={formState.password}
    onInput={check}
  />
  <Input
    name="confirm_password"
    label="Confirm Password"
    {errors}
    class={cn('confirm_password')}
    bind:value={formState.confirm_password}
    onInput={check}
  />
  <Input
    name="email"
    label="Email"
    {errors}
    class={cn('email')}
    bind:value={formState.email}
    onInput={check}
  />
  <Checkbox
    name="tos"
    label="I have read and agreed to the terms of service."
    class={cn('tos')}
    onChange={check}
    bind:checked={formState.tos}
  />
  <footer>
    <Button class="btn-submit" type="submit" {disabled}>Submit</Button>
  </footer>
</form>
Because we have async username validation we need to handle it in the Vest suite's .done() hook. This hook fires when all async validations have run.
Final step is to include our form component in our App.svelte. Notice that we pass down the original form state and submit handler as component properties.
<!-- App.svelte -->

<script>
  import AuthForm from './AuthForm.svelte'

  const submit = data => console.log(data)

  const values = {
    username: '',
    password: '',
    confirm_password: '',
    email: ''
  }
</script>

<AuthForm {values} {submit} />
And here is the final result in action.
Final result#
https://codesandbox.io/s/svelte-vest-form-validation-example-kf185
Libraries mentioned#
- https://github.com/ealush/vest
- https://github.com/validatorjs/validator.js
- https://github.com/vitejs/vite
- https://github.com/jquense/yup
- https://github.com/rixo/rollup-plugin-svelte-hot
Summary#
This was a quick port of Vest's async validation React example to Svelte. The purpose was to show the basics of Vest validation library. This is however not something I would do in the real project. In a real project I would use Svelte's one-way bindings, because they are more flexible for such use case. Want to know how? It's something I teach in my Svelte forms book that you can get here.